DeepAgents · 深度智能体
一、DeepAgents 深度研究智能体应用
DeepAgents 是 LangChain 团队开源的一款高性能智能体框架,专为长周期、高复杂度任务设计。基于 LangChain 和 LangGraph 构建,通过内置的任务规划、文件系统、子智能体等能力,让智能体能够更高效地完成复杂、多步骤的任务,而无需开发者从零搭建底层逻辑。
技术架构
本文基于 LangChain DeepAgents + Tavily Search API,快速构建一个可深度研究的智能体应用。其中 Tavily Search API 采用封装为 MCP Server 的方式提供给智能体调用。
实验配置:
- 模型:自建模型(兼容 OpenAI API 格式)
- 搜索 API:Tavily Search API(封装为 MCP Server)
- 整体流程:DeepAgents → MCP Tools → Tavily API
相关资源
- 官方文档:https://docs.langchain.com/oss/python/deepagents/quickstart
- Github 地址:https://github.com/langchain-ai/deepagents
- Tavily Search API 文档:https://docs.tavily.com/documentation/quickstart
主要依赖版本
1 | tavily-python==0.7.12 |
环境配置
创建 .env 文件,配置自建模型信息:
1 | OPENAI_BASE_URL=https://your-api-base-url.com/v1 |
关键点说明:
OPENAI_BASE_URL:自建模型的 API 基础地址(兼容 OpenAI API 格式)OPENAI_API_KEY:API 密钥OPENAI_MODEL:模型名称- 使用
python-dotenv库加载环境变量,避免硬编码敏感信息
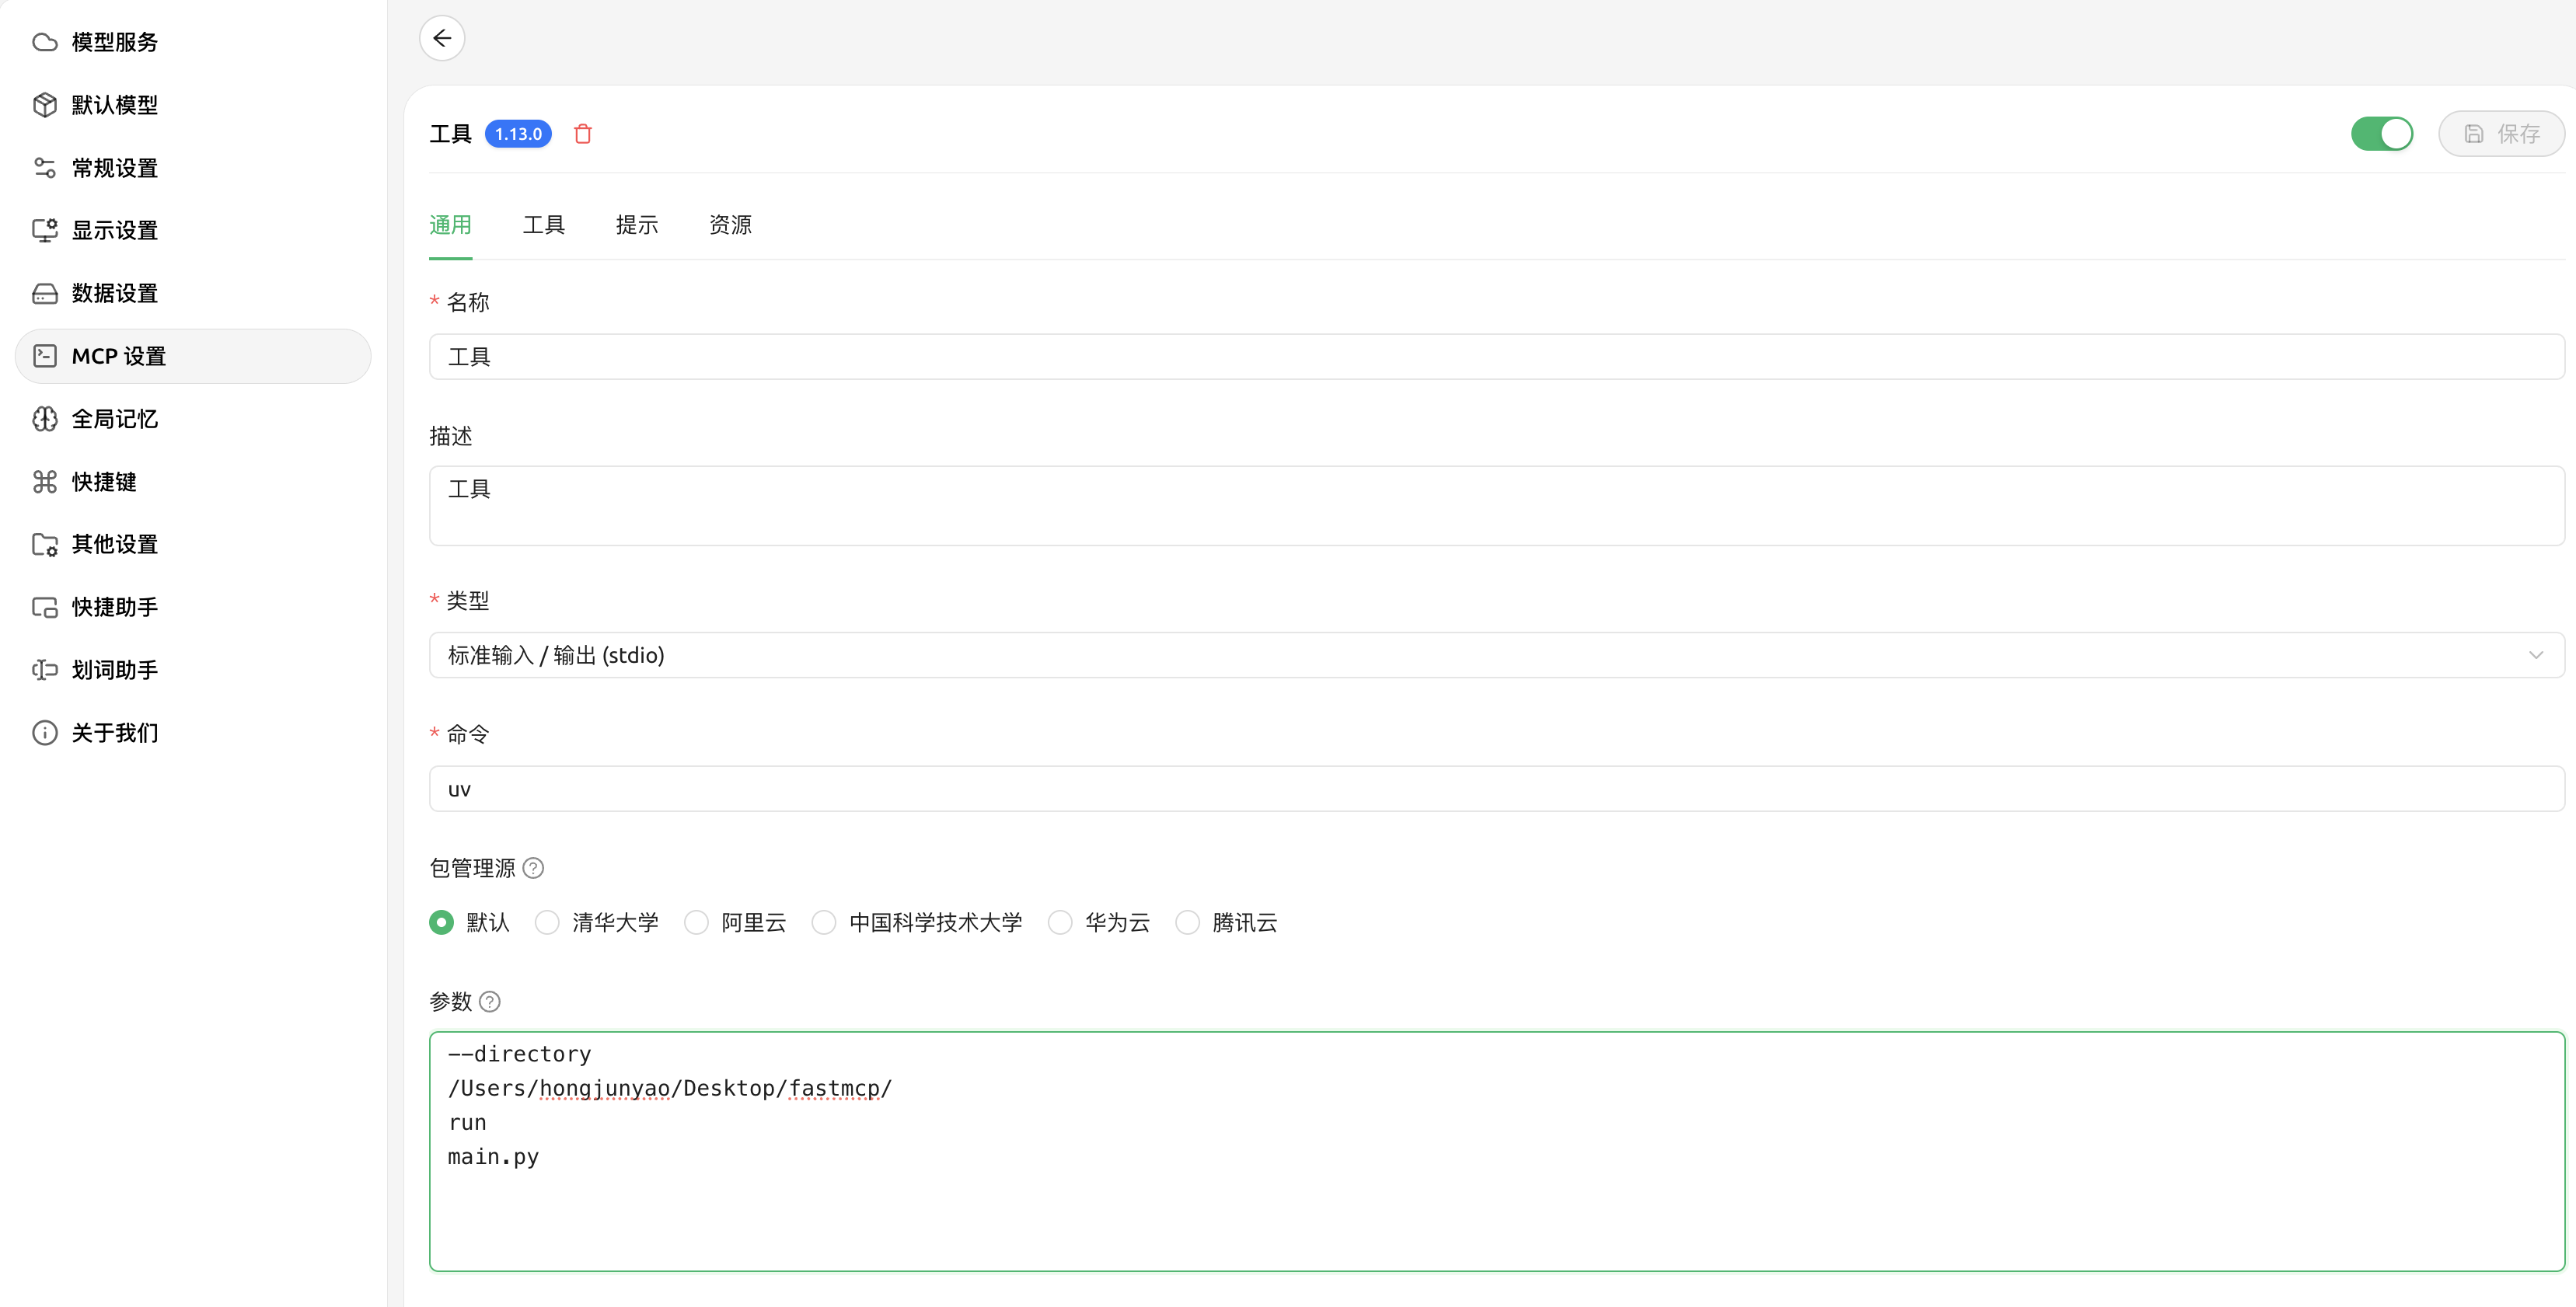
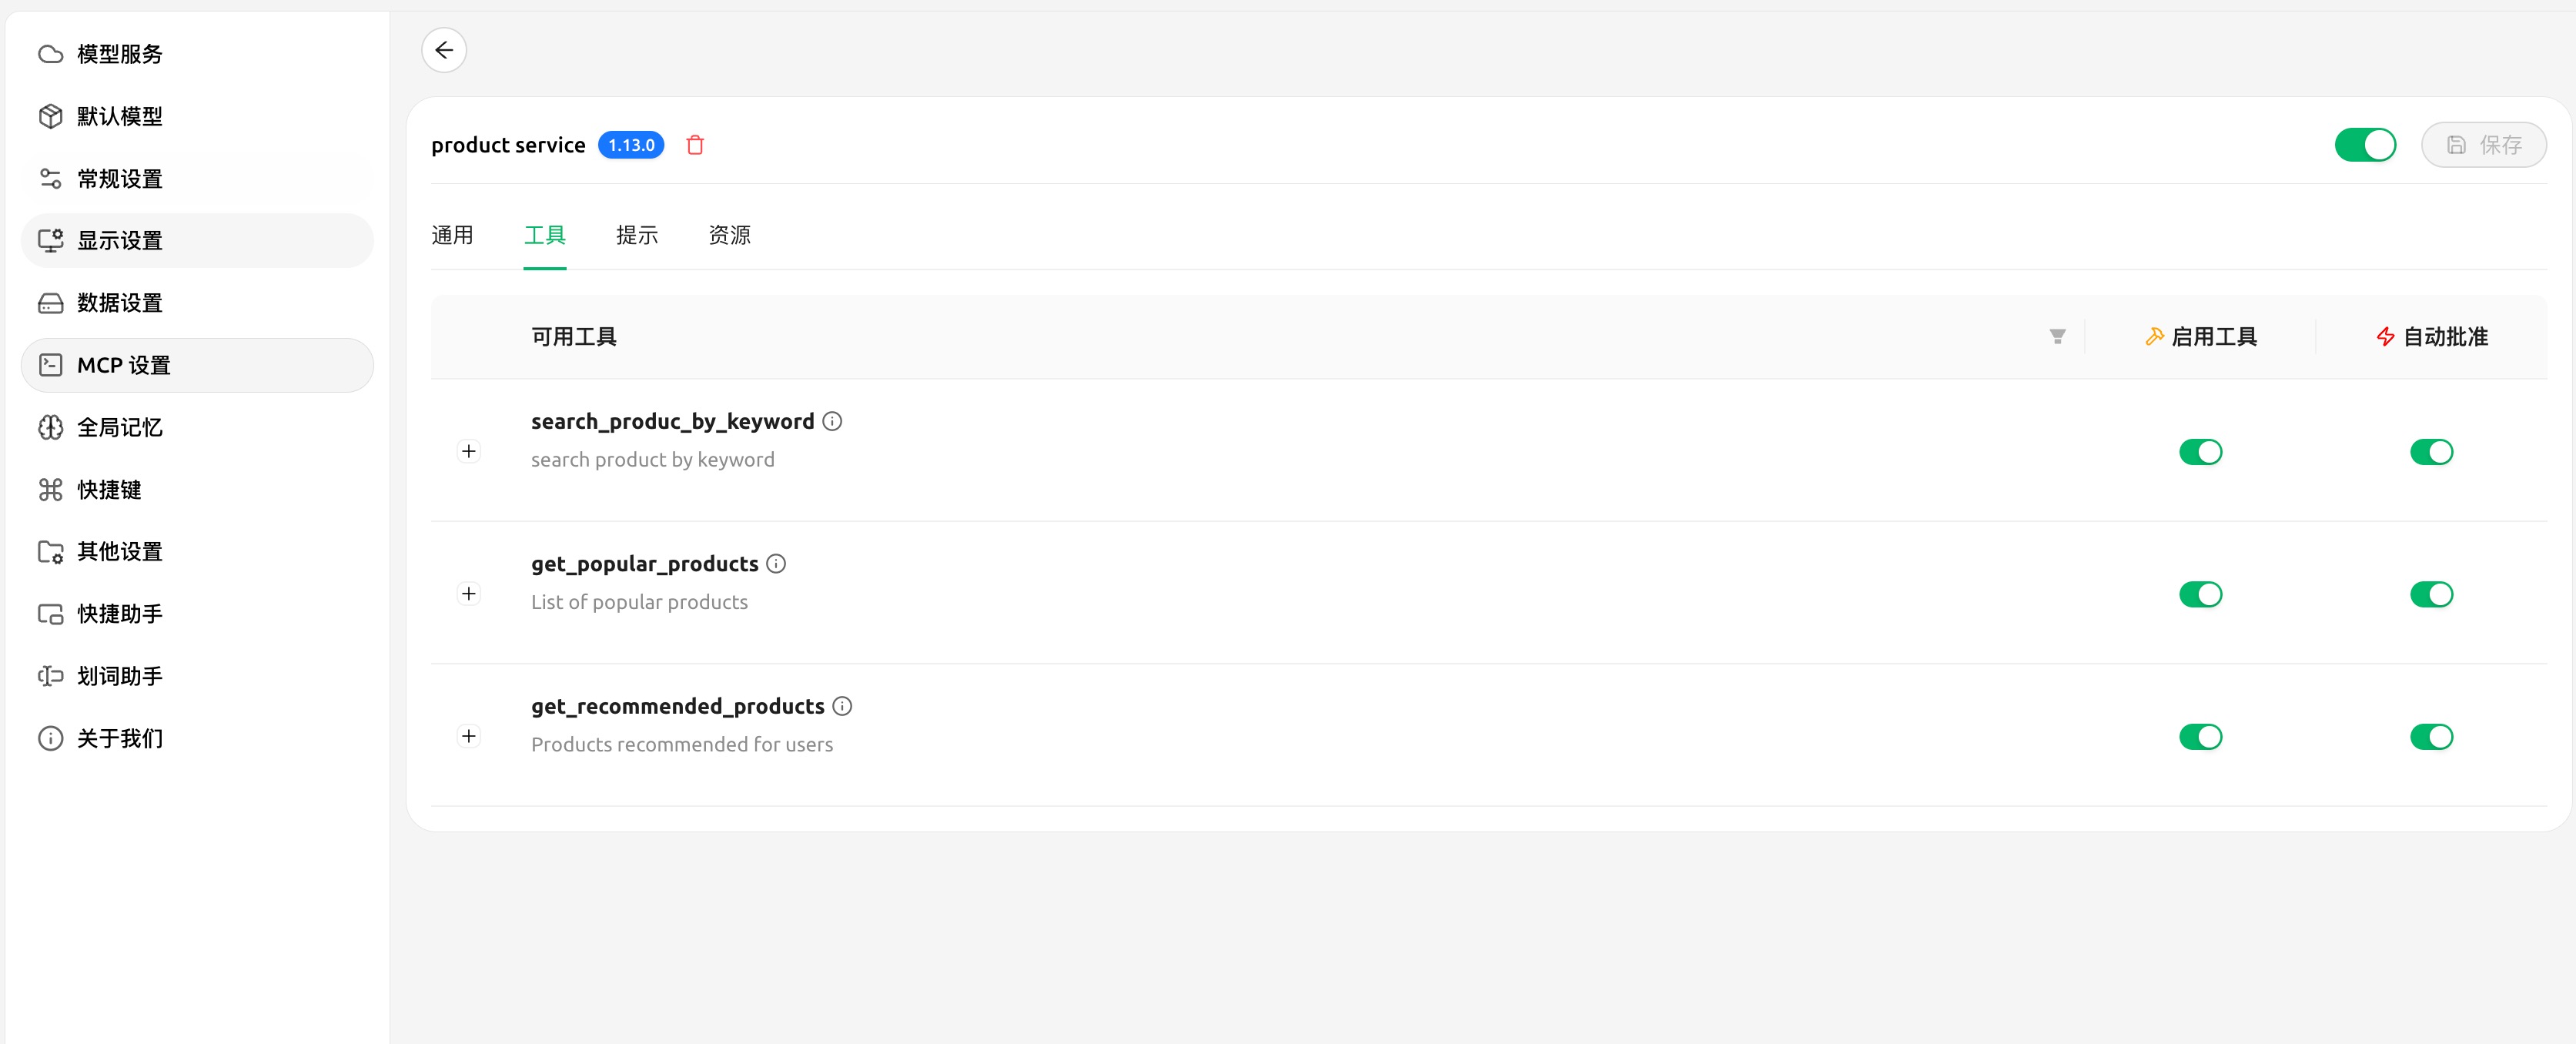
二、Tavily Search API 封装 MCP Server
2.1 MCP Server 实现
将 Tavily Search API 封装为 MCP Server,主要封装两个能力:
- Web 网络搜索:
web_search工具 - 网页内容查看:
extract工具
代码实现:
1 | from mcp.server.fastmcp import FastMCP |
2.2 启动 MCP Server
启动 MCP Server 后,服务运行在 http://localhost:6030/sse,提供 SSE(Server-Sent Events)传输方式。
三、深度智能体搭建
3.1 创建深度智能体
使用 deepagents 下的 create_deep_agent 创建智能体,参数和使用方式与 LangChain 之前的 Agent 创建几乎相同。MCP 工具可以直接使用 MultiServerMCPClient 抽取的 MCP Tools。
完整实现代码:
1 | import os |
关键点说明:
load_dotenv()从.env文件加载环境变量,避免硬编码敏感信息init_chat_model()使用model_provider="openai"指定使用 OpenAI 兼容的 API 格式base_url和api_key参数用于连接自建模型服务- 配置检查确保必需的配置项存在,避免运行时错误
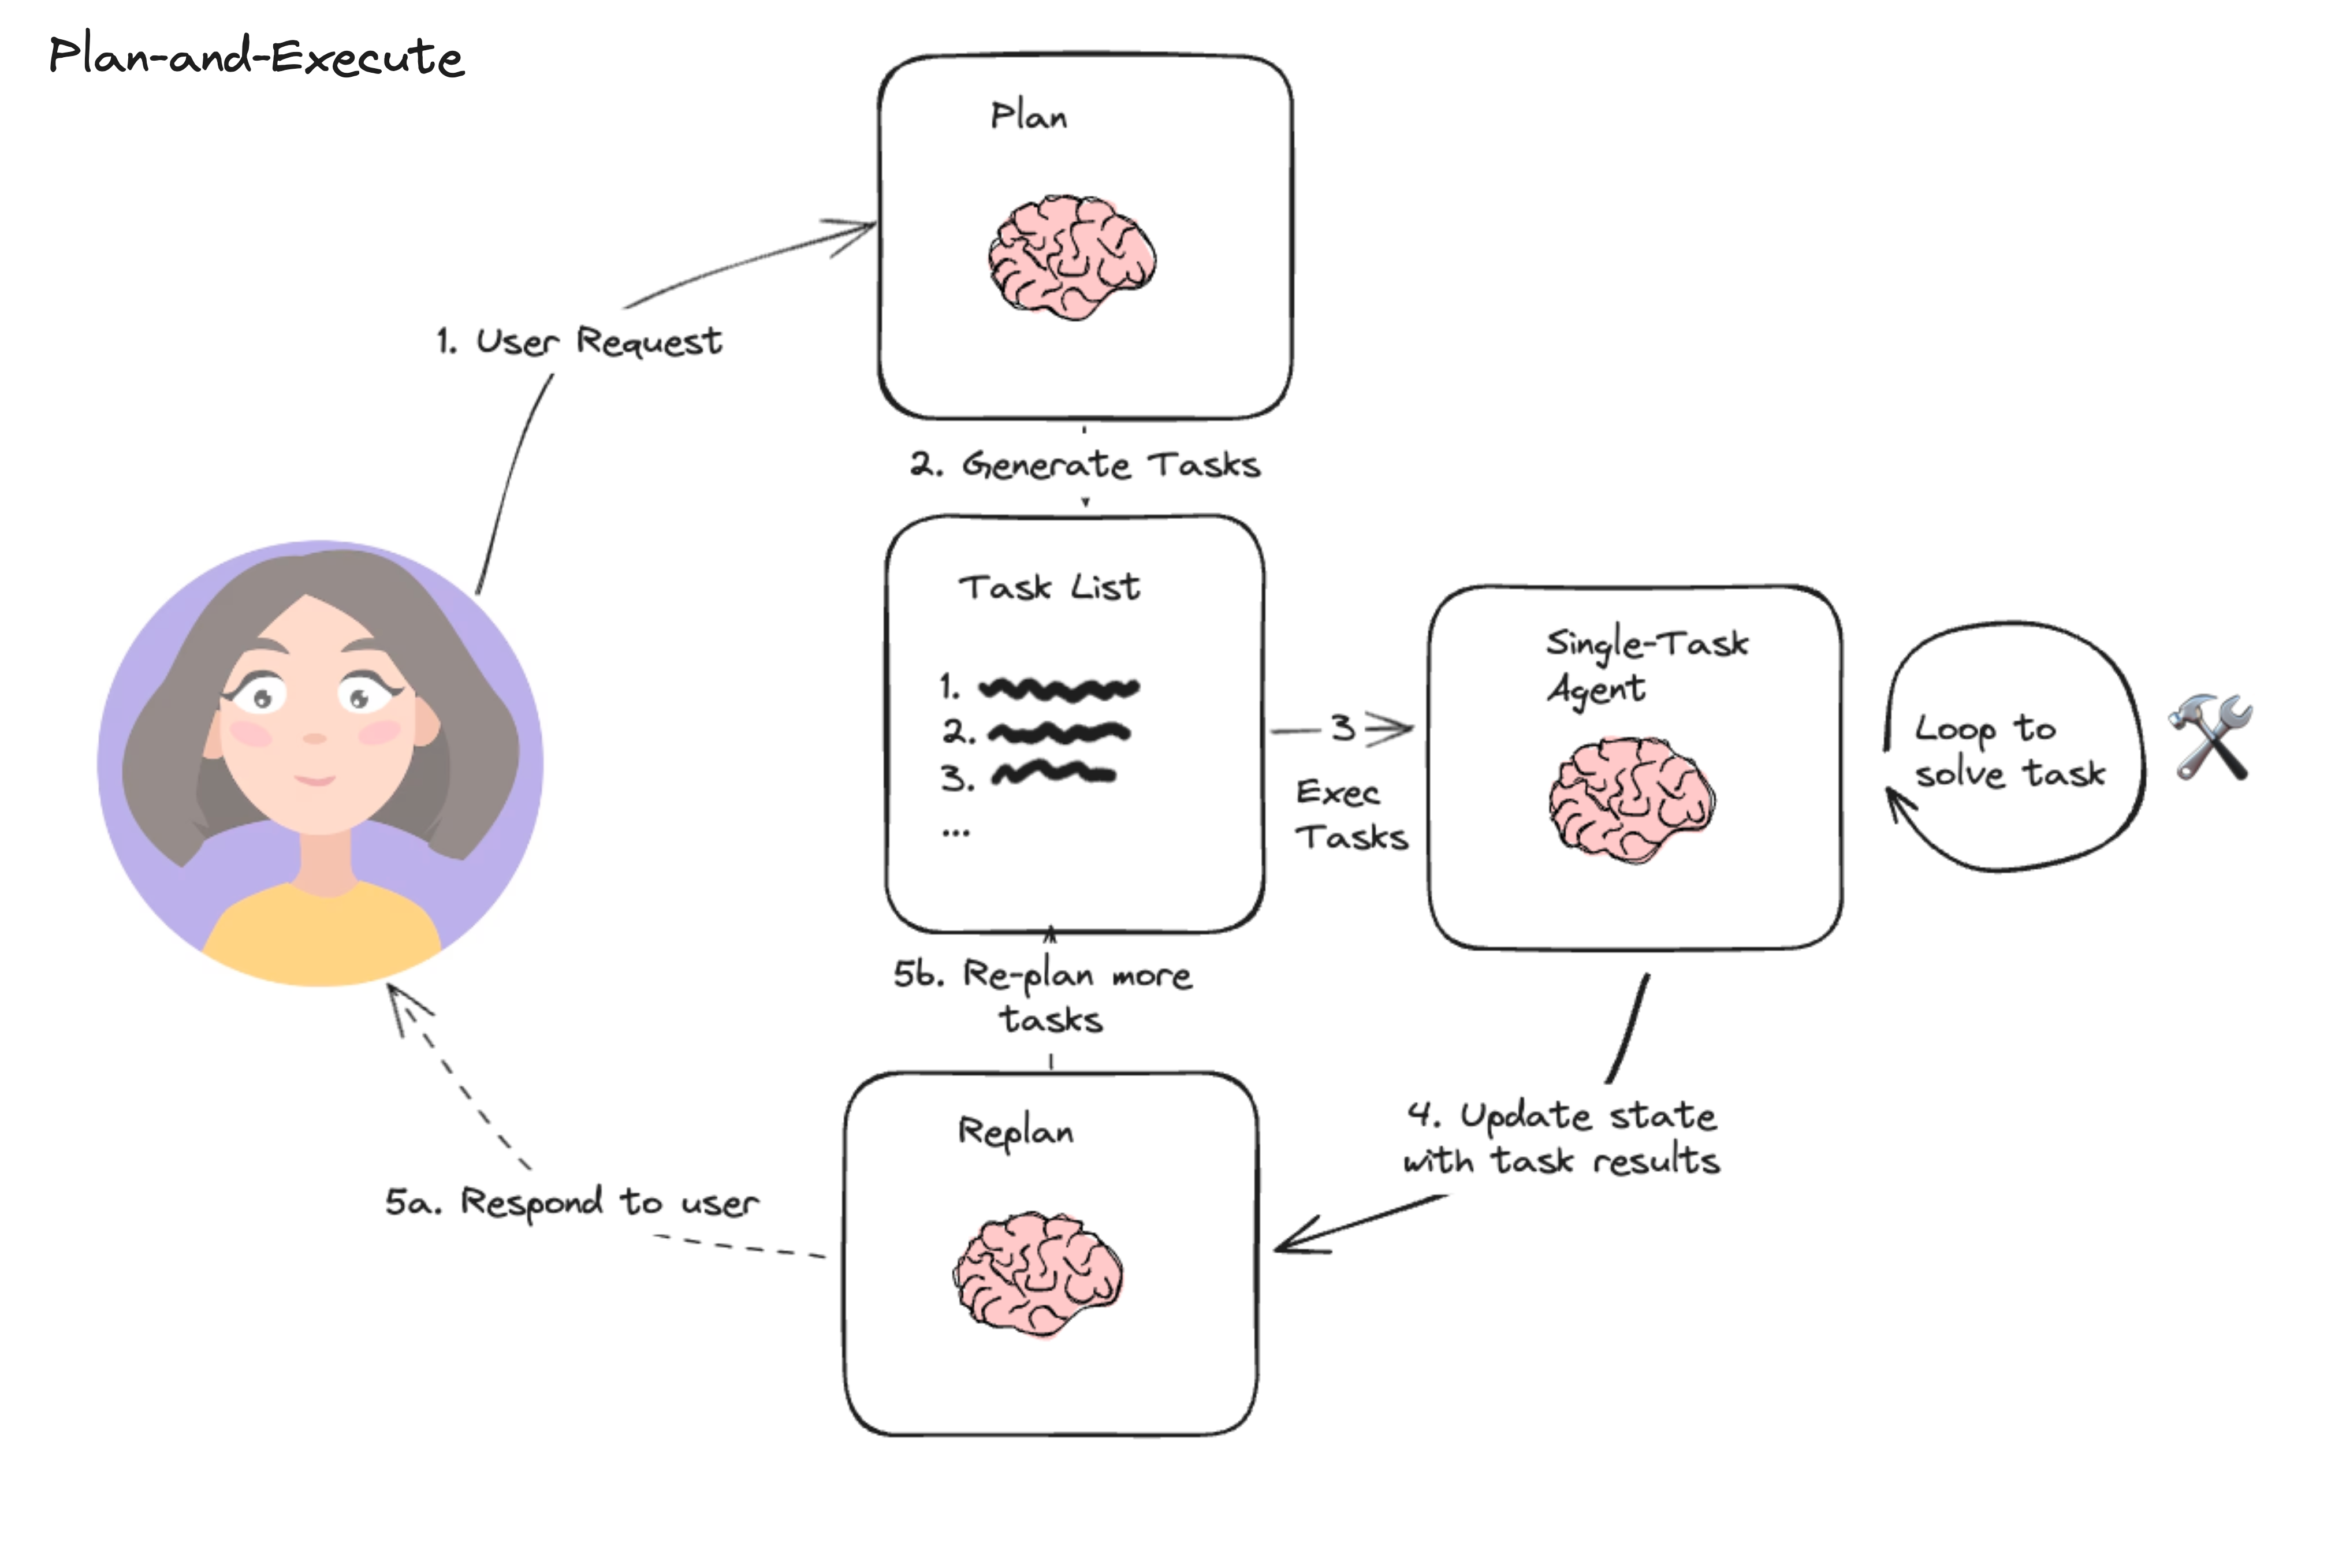
3.2 执行流程说明
智能体的执行流程:
初始化阶段:
- 从 .env 文件加载模型配置(BASE_URL、API_KEY、MODEL_NAME)
- 初始化 LLM 模型(自建模型,兼容 OpenAI API 格式)
- 连接 MCP Server(web-search)
- 获取 MCP Tools
任务规划阶段:
- 智能体根据用户问题生成待办事项(TODO list)
- 每个待办事项标记状态(in_progress、pending、completed)
执行阶段:
- 逐步执行每个待办事项
- 调用 MCP Tools(web_search、extract)获取信息
- 更新待办事项状态
报告生成阶段:
- 整合所有研究结果
- 生成详细的研究报告
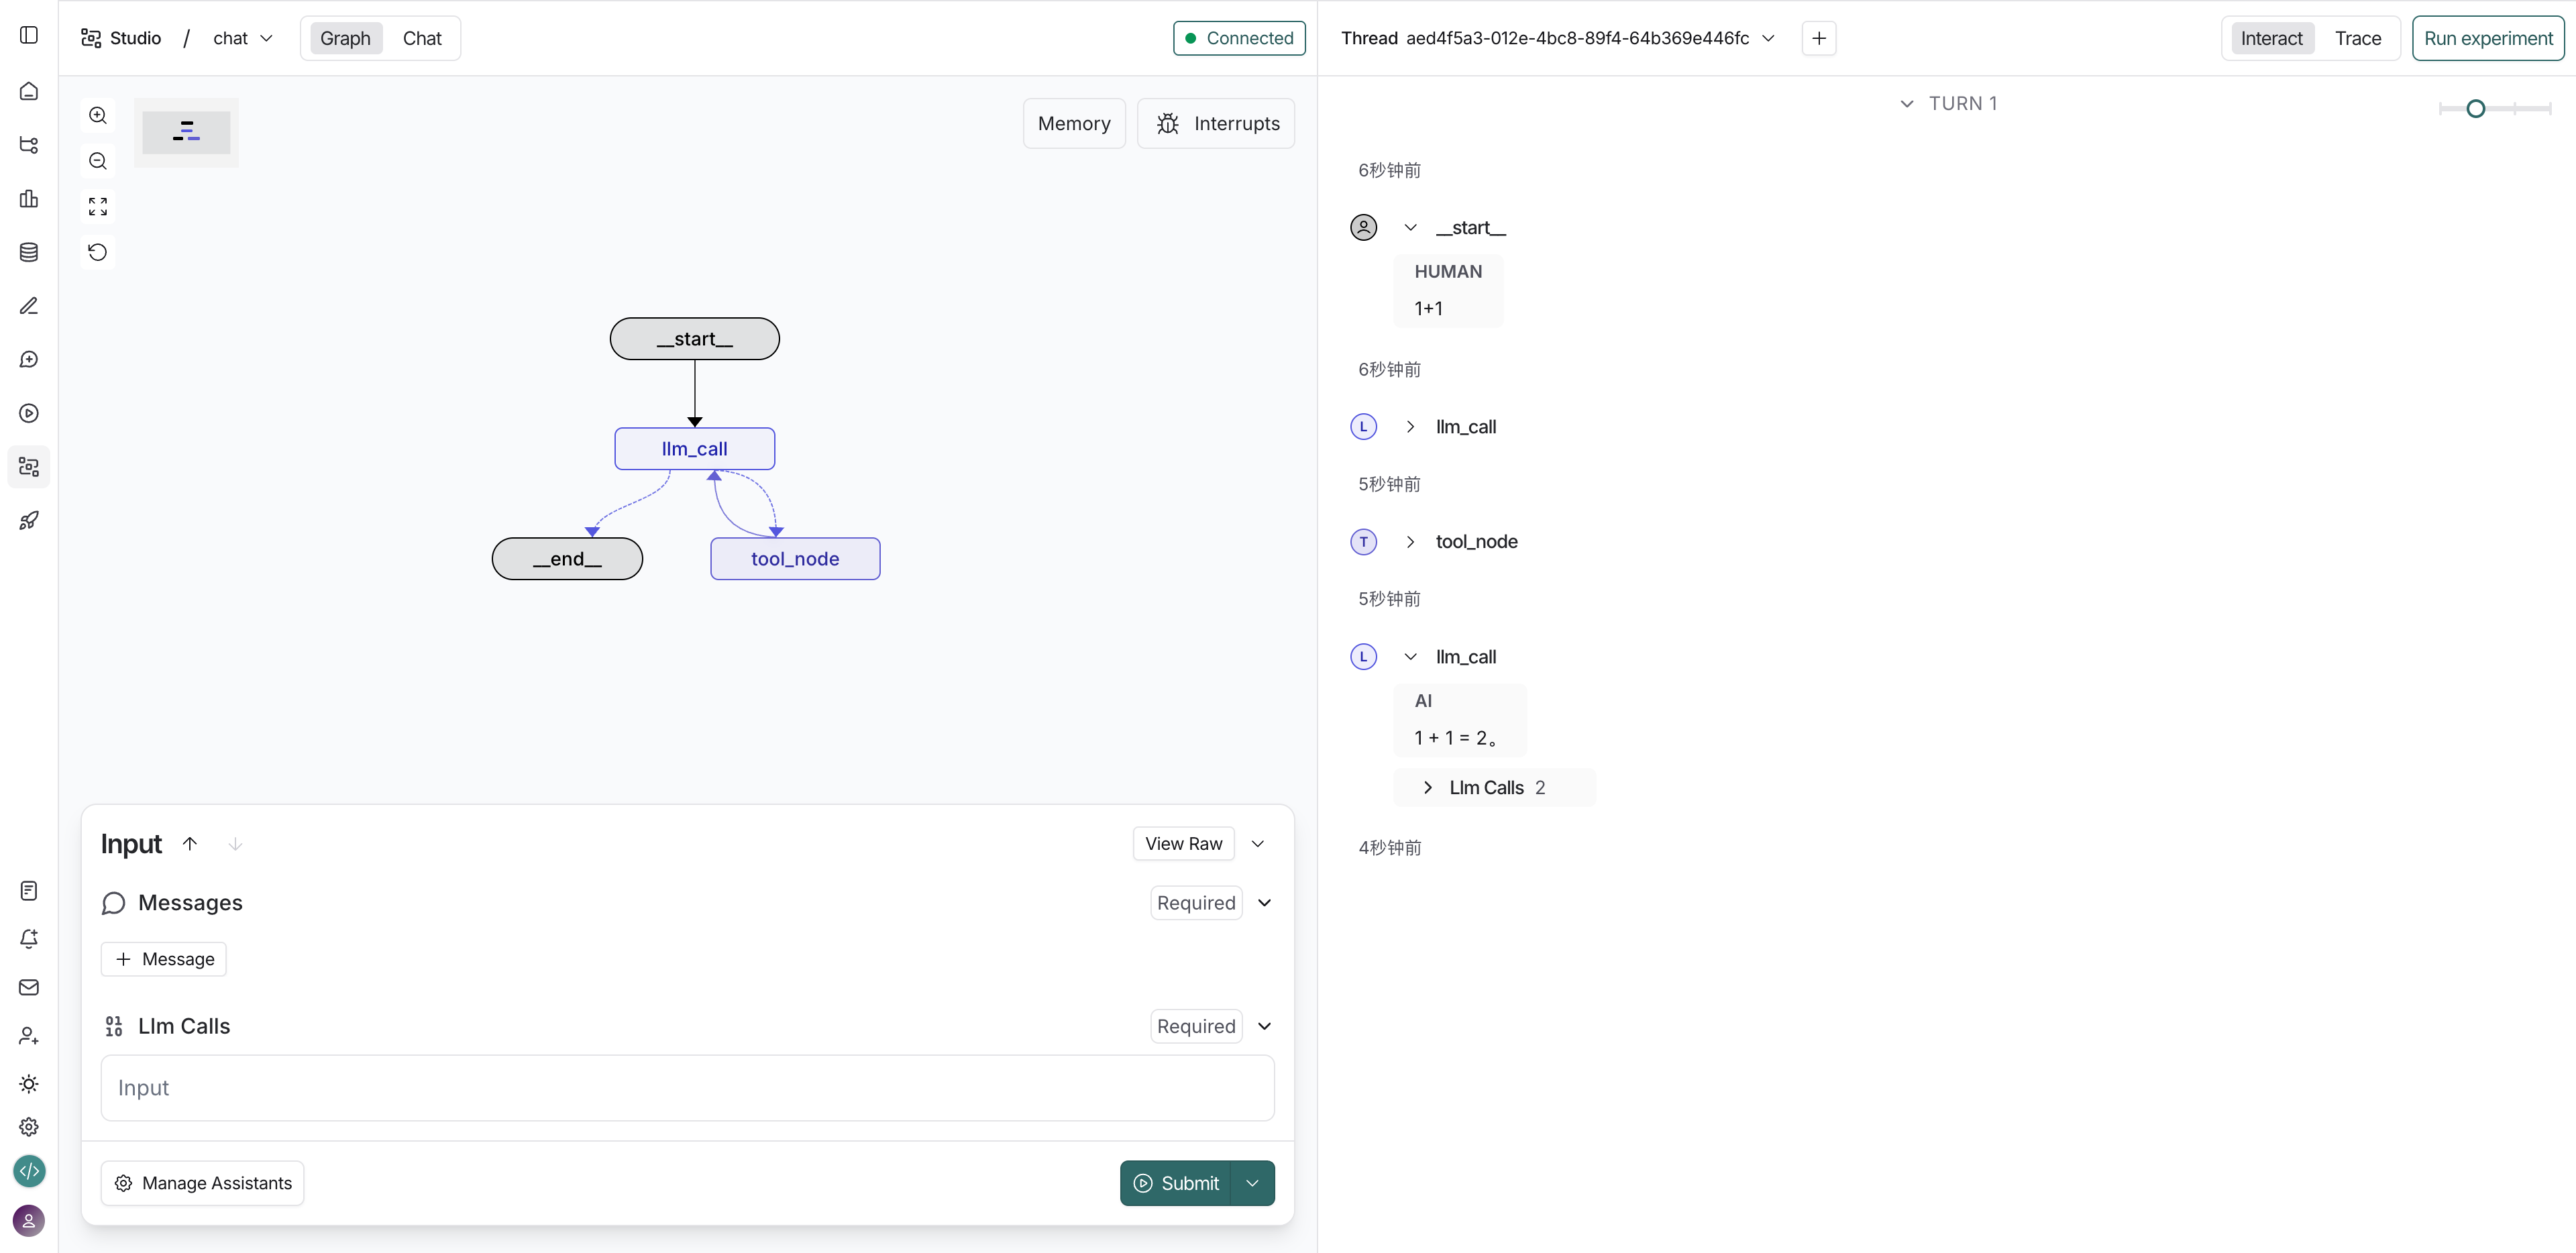
3.3 执行效果示例
测试问题:埃菲尔铁塔与最高建筑相比有多高?
执行过程:
- 智能体先制定初步的待办事项
- 逐步执行每个待办,调用 MCP Server 进行搜索
- 最后生成详细的研究报告
四、封装为 OpenAI 协议接口
4.1 FastAPI 实现
使用 FastAPI 封装为 OpenAI 协议接口,便于在客户端(如 Cherry Studio、OpenWebUI)使用。
注意:这里主要为实现功能,api_key 写死在程序中为:sk-da4b6cb4a41e4cascascasc9508deb556942(随机生成的),后续使用客户端连接时,需要填写该 api_key。
完整实现代码:
1 | import os |
4.2 关键实现点
- API Key 验证:通过
verify_auth函数验证请求的 API Key - 流式响应:使用
StreamingResponse实现流式输出 - OpenAI 协议兼容:返回格式符合 OpenAI Chat Completions API 规范
- 工具输出控制:工具输出内容较多,默认不输出给客户端(可通过注释控制)
4.3 启动服务
1 | python api.py |
服务启动在 http://0.0.0.0:8000,提供以下端点:
POST /v1/chat/completions:聊天完成接口GET /v1/models:列出可用模型GET /health:健康检查
五、使用 Cherry Studio 连接测试
5.1 配置连接
使用任何支持 OpenAI 协议的客户端(如 Cherry Studio、OpenWebUI)连接测试。
Cherry Studio 配置步骤:
- 添加 OpenAI 连接
- Base URL:
http://localhost:8000/v1 - API Key:
sk-da4b6cb4a41e4cascascasc9508deb556942 - Model:
agent_model
5.2 测试案例
案例 1:埃菲尔铁塔与最高建筑相比有多高?
执行过程:
- 智能体制定待办事项
- 逐步执行搜索任务
- 生成详细研究报告
研究报告包含:
- 埃菲尔铁塔高度:330米(2022年更新)
- 世界最高建筑哈利法塔:828米
- 高度对比分析:哈利法塔比埃菲尔铁塔高出498米,是埃菲尔铁塔高度的2.51倍
- 历史意义对比
- 详细的数据表格和分析
六、技术要点总结
6.1 DeepAgents 核心优势
- 内置任务规划:自动生成待办事项,跟踪执行进度
- 文件系统支持:内置虚拟文件系统,支持文件操作
- 子智能体能力:可以派生子智能体处理复杂任务
- 长周期任务支持:专为复杂、多步骤任务设计
6.2 MCP 协议优势
- 标准化工具接口:统一的工具调用协议
- 多服务器支持:可以连接多个 MCP Server
- 灵活传输方式:支持 SSE、WebSocket 等传输方式
- 易于扩展:可以轻松添加新的工具能力
6.3 整体架构优势
- 模块化设计:MCP Server、DeepAgents、API 接口分离
- 易于部署:可以独立部署各个组件
- 客户端兼容:支持任何 OpenAI 协议兼容的客户端
- 流式输出:实时展示智能体执行过程
七、总结
通过 LangChain DeepAgents + MCP 构建深度研究型智能体应用,实现了:
- 强大的研究能力:能够进行深度、多步骤的研究任务
- 灵活的工具集成:通过 MCP 协议轻松集成各种工具
- 良好的用户体验:支持流式输出,实时展示执行过程
- 标准化接口:通过 OpenAI 协议兼容各种客户端
这种架构为构建复杂的 AI 应用提供了强大的基础,特别适合需要深度研究、多步骤执行的任务场景。